In an attempt to expand the series the Hunter range had external storage added, initialy as the
Oracle Disk Drive. Quite large and not too portable compared to the likes of the Tandy Portable Drive
or the Epson PF-10. The revamped version was the Oracle GT and was a metal clad ' Rugged(ish) ' drive not
unlike the 3.5 inch drive used on the Psion 3 range.
This drive however supported both 720k and 1.4mb disks and software support for the drive was built into the
Hunter 16 , with a piece of retro fit software it's use under Basic from a Hunter 2 was possible. The User group
has this software as a PDF, in the file library ( reference = Oracle Gt Tech Notes.pdf )
This page details my attempts to get an Oracle GT up and running after it had been given a long sleep,
and as usual ' Suspect the batteries ' first. The photo below shows the rear of the drive with the top cover
removed and the Ni-cad batteries connector to the very left.
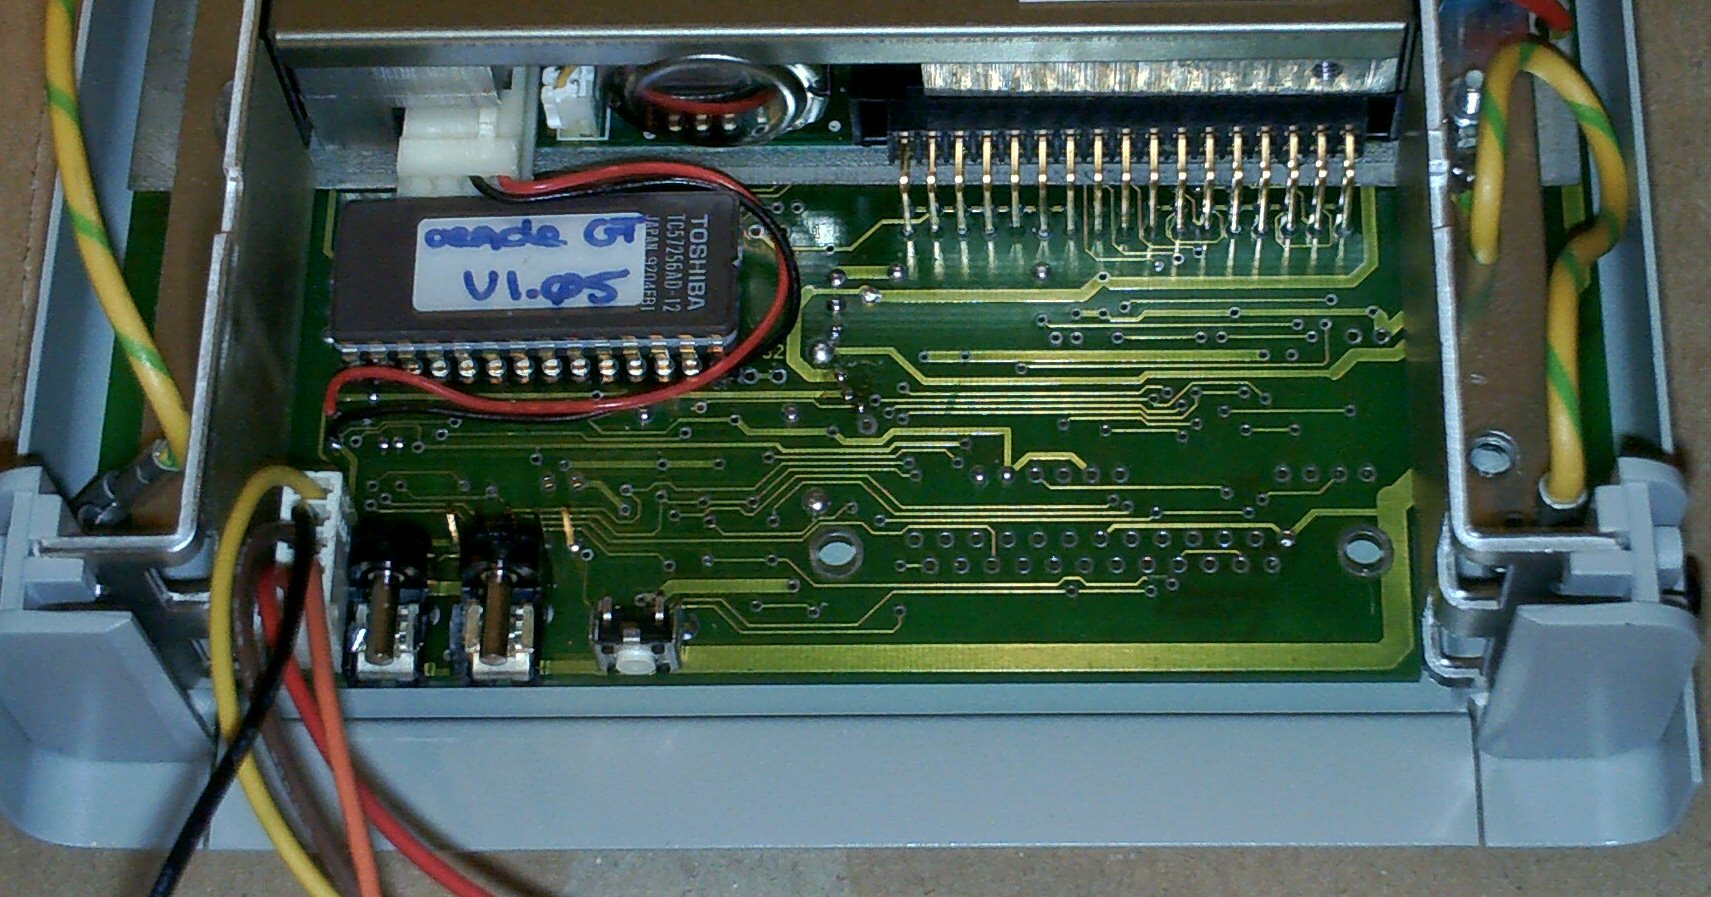
Note the firmware Rom, and below the rom in order from left to right, after the battery connector. The Two
( Yes two ) power connectors ( connected in Parallel ), and the Power on/off push button
The PCB assy is marked C-7629-3300 and dated 1989-ORACLE GT, a picture is loaded onto the User Group web site.
A quick examination of the PCB showed a 48 Pin HD63265P Floppy Disk controller and a set of leds which give a
battery level display, when viewed from the front. Polarity of the supply is Pin Positive and shell Negative,
on a 5 m/m x 2.5 m/m power connector, which can handle quite a large current ! But what was the supply voltage ?
So I started with a 4.5 volt supply and when the charge current had settled down to below 30 m/a, I increased it
to 5.5 volts. Again after a while the 100 m/a or more charge current settled down to 25 m/a or so, nothing
had burst into flames and the drive led was starting to glow at a low level. Time to try my luck, so I pushed
a blank 720k disk into the drive. To my delight the drive did a spin up, a restore seek and then to my horror
Died.
The charge current had swung up to 170 m/a and the drive sat slowly clicking as if muttering about bieng woken
up at all. Despite this sullen behavior, it was obvious that I was close on the voltage, but the original batteries
were useless. A set of four Ni-cad's of the correct size ( 2/3rds AA ) were not available, so 4 off normal AA size were
assembled on a header plug and the experiment above repeated. This time all worked well and I settled on 6 volts dc
as bieng in line with Husky standards on power supplies, and compatible with the Company supplied range of portable
battery packs.
The drive when fully charged, powers up as shown here:-
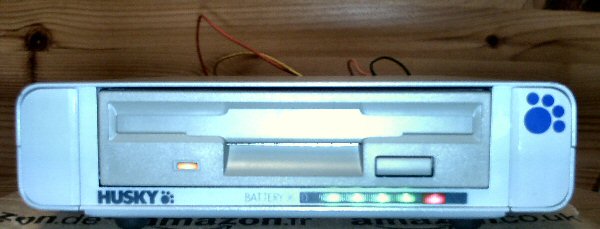
Light display on battery leds above:-
| Green | Green | Green | Green | Red | Meaning |
| on | on | on | on | fast flash | Charging |
| on | on | on | on | slow flash | Charging Complete |
| on | on | on | on | on | Power on test |
| on | on | on | on | off | Standby full power |
| on | on | on | off | off | Standby < 80% battery |
| on | on | off | off | off | Standby < 40% battery |
| on | off | off | off | off | Standby < 20% battery |
| off | off | off | off | off | Time out / Auto power off |
| off | off | off | off | flash | 150 Baud |
| off | off | off | flash | off | 300 Baud |
| off | off | off | flash | flash | 600 Baud |
| off | off | flash | off | off | 1200 Baud |
| off | off | flash | off | flash | 2400 Baud |
| off | off | flash | flash | off | 4800 Baud |
| off | off | flash | flash | flash | 9600 Baud |
| off | flash | off | off | off | 19200 Baud |
| off | flash | off | off | flash | 38400 Baud |
To enter the Baud rate settings, I had to connect the external power supply and then by pressing and holding the power
on button the status leds would start flashing. Once the leds are flashing each quick depression of the power button
advances the baud setting, which cycles back to the lowest setting after the highest!
To complete the setting, just release the button and the drive stores the setting !
Can the rate be set any other way ? ie by software ? or when the drive is only battery powered.
I have no idea, as I do not have a manual. But this works for me.
A reset for the micro controller is located via a small ( paper clip size hole ) under the drive !
How to use the drive:-
Connect the 5 pin plug into the Com2: port on the Hunter 16. Power up the hunter then the drive, after which your
Oracle GT should be able to Read, Write and give Directory listings. Your drive will stay powered up whilst connected
however when the Hunter is powered off or the Com2 port is disconnected the drive will Auto power down after about 25
Seconds. ( I have not discoved a way to power the drive down via the off button whilst connected )
Disks produced are DOS standard and are a quick way of transfering data from a PC. Read and Write speeds
are somewhat limited as the link is serial and maximum speed is 38400. But it works, and works well to change
software in the field.
The drive works well with both of my 16's and I am about to try to see if the PDF'ed software for the Hunter 2
also Works !
Home

©"Copyright Shedland Software design" ( Designed for 800 x 600 Resolution ) and a 'POPUP' and 'FRAMES' free zone
Legal Info = ©"Copyright Shedland Software design"
An Oldwuzzark Production